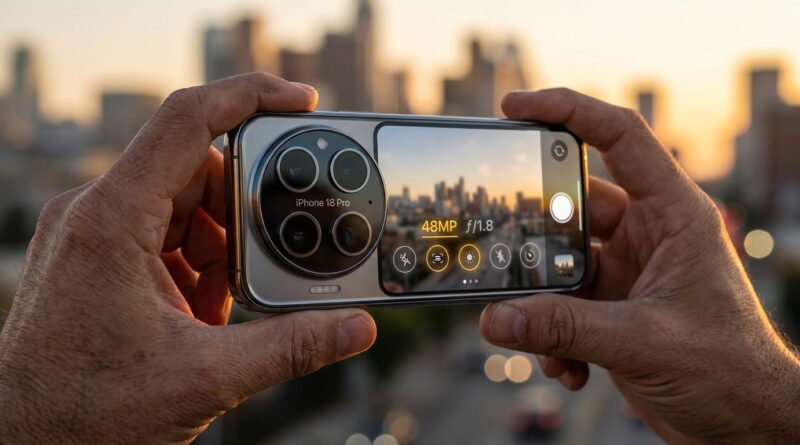
Stop Letting Auto Mode Ruin Your Shots: The Hidden ‘Permanent 48MP + Aperture Lock’ Trick iPhone Power Users Use For DSLR‑Level Photos
You are not imagining it. You buy an iPhone Pro because Apple talks up 48MP detail and fancy depth control, then you snap a photo, zoom in, and it still looks soft and flat. Frustrating, right? The annoying part is that the camera often slips back into safer defaults that save storage and processing time, not maximum image quality. So even if you turned on 48MP once, or adjusted the aperture for a better background blur, the Camera app may not keep those choices the next time you open it. That is why so many “great on paper” iPhone photos end up looking like ordinary phone shots. The good news is that there is a repeatable setup that fixes this. If you want to know how to lock 48MP camera settings on iPhone, and make your preferred aperture behavior stick as much as Apple allows, it only takes a few minutes to set up properly.
⚡ In a Hurry? Key Takeaways
- To lock 48MP camera settings on iPhone, turn on ProDefault or Resolution Control in Settings, then enable Camera Preserve Settings so the app remembers your last choice.
- If your iPhone supports adjustable aperture or depth control, set your preferred look in the right shooting mode and turn on Preserve Settings for Creative Controls or Depth, if available.
- 48MP files look better when you crop or print, but they use more storage and may not appear in every mode, especially low light, Live Photos, flash, or some zoom settings.
Why your iPhone keeps “forgetting” the good camera settings
Apple designs the Camera app for speed. Point, tap, done. For most people, that is fine. For anyone who actually cares about image quality, it can be maddening.
By default, the iPhone often favors a lower resolution photo because it is faster to process, smaller to store, and easier to share. It may also reset creative choices between sessions unless you tell it not to. So you think you are shooting with the full power of the main camera, but the phone is quietly making conservative decisions for you.
That is the real issue. The hardware is excellent. The defaults are just cautious.
First, check whether your iPhone supports this
The exact menu names vary by model and iOS version, but the general steps are similar on recent Pro iPhones with a 48MP main sensor.
You are most likely in business if you have:
iPhone 14 Pro, 14 Pro Max, 15, 15 Plus, 15 Pro, 15 Pro Max, and newer models with a 48MP main camera. Some features, like ProRAW, HEIF Max, or adjustable aperture controls, may differ depending on the model.
If you do not see the options below, update iOS first. Then check again under Settings and the Camera app.
How to lock 48MP camera settings on iPhone
This is the part most quick videos skip. Turning on 48MP is only half the job. You also need to make the Camera app remember it.
Step 1: Turn on the high-resolution option
Go to Settings > Camera > Formats.
Now look for one of these options:
- Resolution Control
- ProDefault
- Apple ProRAW & Resolution Control
- HEIF Max or ProRAW Max
What you want is the setting that lets the Camera app offer full-resolution 48MP capture from the main lens.
If you want the best balance of quality and file size, HEIF Max is often the sweet spot. If you want the most editing room, choose ProRAW 48MP, but expect very large files.
Step 2: Turn on the on-screen 48MP control
Once enabled in Settings, open the Camera app. In Photo mode, look for a button near the top of the screen that may say RAW, HEIF MAX, MAX, or show a resolution toggle depending on your model.
Tap it so the high-resolution mode is active.
This part matters because some iPhones let you enable the feature globally, but still require you to switch it on in the Camera app before shooting.
Step 3: Make the Camera app remember your last choice
Now go to Settings > Camera > Preserve Settings.
Turn on any options related to keeping your last-used camera setup. These may include:
- Camera Mode
- Creative Controls
- Exposure Adjustment
- Night Mode
- Portrait Zoom
- Depth Control
- Macro Control
- ProRAW & Resolution Control or similarly named setting
This is the hidden trick most people miss. If the preserve option for resolution is off, the phone can go right back to its lower-detail behavior the next time you open the app.
What about “aperture lock” on iPhone?
This is where phone camera marketing gets slippery.
On many iPhones, you are not changing the physical aperture in the same way you would on a DSLR or mirrorless camera. In Portrait mode and some newer camera systems, you are often adjusting simulated depth-of-field, or choosing how the phone blends lens behavior and software blur. It still looks useful. It is just not always a literal iris opening and closing like on a traditional camera.
If your model offers a variable aperture or a depth control slider, here is how to make it stick as much as possible.
How to keep your preferred aperture or depth look
- Open the Camera app and switch to the mode where the control appears, usually Portrait or a supported Photo mode.
- Adjust the f-stop or depth slider to the look you want. For example, a lower number gives a blurrier background, while a higher number keeps more of the scene sharp.
- Go back to Settings > Camera > Preserve Settings.
- Turn on Depth Control, Creative Controls, or any similarly named option.
If your iPhone truly supports a hardware aperture setting, Apple may still limit when it stays active, depending on lens, lighting, or mode. So think of this less as a perfect permanent lock and more as a “remember my last preferred look” setting.
When 48MP will not stay on, even after you set it up
This catches people all the time. Your settings may be right, but the phone will still drop out of 48MP in certain situations.
Common reasons:
- Low light. The phone may switch to pixel-binned 24MP or 12MP for better brightness and less noise.
- Live Photos. Some high-resolution modes do not work with Live Photo enabled.
- Flash. Using flash can force a different capture mode.
- Macro mode. The ultra wide camera usually is not the 48MP main sensor.
- Certain zoom levels. If you are not at the main lens’s native crop or sensor mode, resolution may change.
- Night mode. The phone may prioritize a cleaner shot over full resolution.
So if you really want the sharpest 48MP file, shoot in good light, turn off Live Photo, use the main lens, and keep an eye on the resolution icon before pressing the shutter.
The best real-world setup for most people
If you want great detail without filling your storage in two weekends, this is the setup I recommend for most readers:
- Format: HEIF Max, if your phone offers it
- Preserve Settings: Turn on everything related to resolution, creative controls, and depth
- Live Photo: Off when quality matters most
- Main lens: Use 1x in good light for true high-detail shots
- Portrait depth: Set it once to your preferred look and let Preserve Settings remember it
This gives you files with enough detail to crop heavily, print nicely, and still avoid the monster file sizes of shooting everything in ProRAW.
How to tell if your photo was actually shot in 48MP
Do not trust your memory. Check the file.
On iPhone:
Open the photo in the Photos app, swipe up, or tap the info button. Look for image dimensions and file type.
A true 48MP image will have much larger dimensions than a standard 12MP or 24MP shot. The file size will usually be noticeably bigger too.
Rough guide:
- 12MP: small file, basic quick shot
- 24MP: Apple’s common middle ground on newer phones
- 48MP: best for cropping, editing, and printing
Does this actually make your iPhone photos look “DSLR-level”?
Sometimes yes, with a big asterisk.
In good light, with the main sensor, a 48MP image from a recent iPhone Pro can look fantastic. You get more texture in hair, fabric, buildings, leaves, and distant details. If you crop later, the difference is obvious.
But physics still matters. A larger dedicated camera sensor and real interchangeable lenses still win in tricky light, fast motion, and truly natural background blur.
What this trick does is stop your expensive phone from acting like a basic point-and-shoot when you want more from it.
A few simple shooting habits that help even more
Settings are only half the battle. A couple of small habits make a bigger difference than people expect.
Use the main lens when quality matters
The best sensor is usually the main one. If you jump between lenses or digital zoom, detail can drop fast.
Tap to focus
Especially for close subjects. A 48MP file that is slightly out of focus is still a bad photo.
Hold still for one extra beat
Phone cameras do a lot of behind-the-scenes processing. Giving the shot one calm second helps.
Do not leave every shot in Portrait mode
Portrait can look great, but software blur still makes mistakes around hair, glasses, pets, and edges. For some scenes, a crisp 48MP standard Photo shot looks more natural.
Troubleshooting if your menus do not match this guide
Apple changes names often. If you cannot find the exact options:
- Update to the latest iOS version
- Check Settings > Camera > Formats first
- Then check Settings > Camera > Preserve Settings
- Open the Camera app and look for RAW, MAX, or a resolution badge at the top
If you still do not see it, your specific iPhone model may not support full manual-style control in the way social media videos suggest.
At a Glance: Comparison
| Feature/Aspect | Details | Verdict |
|---|---|---|
| 48MP capture | Needs to be enabled in Settings, then usually activated in the Camera app with MAX, HEIF Max, or RAW/48MP controls. | Worth it for detail, cropping, and prints. |
| Permanent lock behavior | Not fully automatic unless Preserve Settings is turned on. Even then, some modes and lighting conditions can override it. | Mostly reliable, but not absolute. |
| Aperture or depth control | Often a simulated depth effect rather than a true DSLR-style manual aperture. Best preserved through Depth Control or Creative Controls settings. | Useful for look and style, but not the same as a dedicated camera lens. |
Conclusion
If you have been wondering how to lock 48MP camera settings on iPhone, the answer is simple but annoyingly hidden. First, enable the full-resolution format in Settings. Then switch it on in the Camera app. Then, most important of all, go into Preserve Settings so your iPhone stops forgetting what you told it to do. Do the same for any depth or aperture-style control your model supports. This helps right now because Apple’s newest Pro phones have excellent camera hardware, but the out-of-the-box defaults still lean toward smaller files and safer auto decisions. A lot of social posts show the flashy toggle. Very few show how to make it stick. Once you do, every quick photo has a much better chance of being something you can crop, print, or share proudly instead of regretting the moment you zoom in.