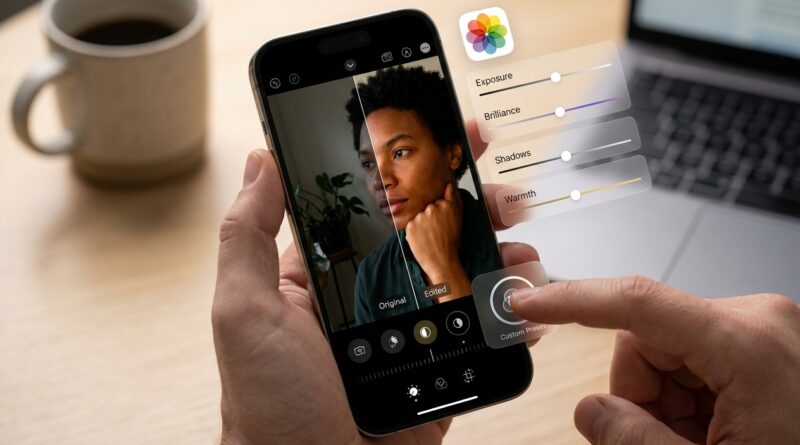
Stop Letting Bad Photos Be Permanent: The Hidden ‘One‑Tap Photo Rescue Presets’ Trick iPhone Power Users Use To Fix Shots In 5 Seconds
You know the feeling. You take what looked like a great photo, check it later, and suddenly it looks terrible. The room is too dark. The sky is washed out. Someone’s face is hiding in shadow like they were photographed in a cave. Then you open the iPhone Photos app, stare at a wall of sliders, and start guessing. A little Brilliance here. A little Exposure there. Ten taps later, it somehow looks worse. The good news is you do not need a fancy editing app or a photography degree. One of the best hidden iPhone photo editing tricks is using the Photos app to create a few repeatable “rescue” edits, then pasting those edits onto similar photos in seconds. Once you build two or three go-to fixes, your bad shots stop being permanent, and editing goes from annoying to almost automatic.
⚡ In a Hurry? Key Takeaways
- The fastest fix is to edit one photo properly, tap the three-dot menu, then use Copy Edits and Paste Edits on similar shots.
- Build two or three simple “rescue presets” for dark indoor photos, bright daylight shots, and grainy low-light selfies.
- Your original photo stays safe. iPhone edits in Photos are non-destructive, so you can always revert.
The hidden trick most iPhone owners miss
The iPhone Photos app does not call them presets in a big obvious way, which is why many people miss this. But the feature is effectively there.
Edit one image until it looks right. Then tap the three-dot menu in the top right and choose Copy Edits. Open another similar photo, tap the three-dot menu again, and choose Paste Edits.
That is the whole trick.
If you took six photos at the same birthday dinner, or a batch of outdoor pictures in harsh sun, you do not need to re-edit each one from scratch. You fix one, then paste those edits onto the rest.
It is the photo version of working smarter, not harder.
Why this matters more in iOS 17 and iOS 18
Apple quietly made the Photos app much better over the last couple of iOS updates. It now has enough control to fix most everyday photo problems without sending your pictures into Snapseed, Lightroom, or some random app full of ads.
You can adjust exposure, brilliance, highlights, shadows, contrast, brightness, black point, saturation, vibrance, warmth, sharpness, definition, noise reduction, and more.
That sounds like a lot because it is. The problem is not power. The problem is decision fatigue.
Most people poke at sliders randomly. Power users do something simpler. They build a few reliable recipes and reuse them.
How to make your first “photo rescue preset”
Step 1: Pick one photo with a common problem
Start with a photo that represents a problem you see all the time. Maybe your indoor shots are always too dark. Maybe daylight photos blow out the sky. Maybe your front-camera night selfies look soft and noisy.
Step 2: Tap Edit in Photos
Open the picture in the Photos app and tap Edit.
Step 3: Fix it carefully once
Do not try to make it perfect. Try to make it consistently better. That is the key.
Step 4: Copy those edits
Tap the three-dot menu and choose Copy Edits.
Step 5: Paste onto similar photos
Open another photo taken in similar lighting and choose Paste Edits.
If it works well on several images, congratulations. You just made your own practical preset.
Three bulletproof rescue presets worth building
1. Dark indoor photo rescue
This is probably the one most people need first. Restaurants, living rooms, school events, and evening photos often come out dim, muddy, and yellow.
Try this as a starting point:
- Exposure: slightly up
- Brilliance: up a moderate amount
- Highlights: down a little
- Shadows: up
- Brightness: up slightly
- Black Point: down a touch if the image gets too heavy
- Warmth: down slightly if the room looks too orange
- Definition: up a little
Why it works: indoor photos usually need more light in the face and midtones, but not a full blast of exposure that makes everything look washed out.
If skin starts to look gray or lifeless, back off on Shadows and increase Warmth just a bit.
2. Blown-out daylight rescue
Bright outdoor photos can fool the iPhone camera. Faces look dark, but the sky is almost white. Or the whole scene looks flat and harsh.
Try this starting mix:
- Highlights: down noticeably
- Exposure: down slightly
- Shadows: up a little
- Contrast: up a touch
- Vibrance: up slightly
- Brilliance: up or down depending on the photo, use this one carefully
- Black Point: up a little for depth
Why it works: you are pulling detail back into the bright parts while keeping people from turning into silhouettes.
This is especially handy for beach photos, kids at the park, and vacation pictures taken at noon when the sun is doing nobody any favors.
3. Grainy low-light selfie rescue
Low-light selfies are tricky because brightening them too much often makes the noise worse. You want cleaner, softer light without making your face look like a wax figure.
Try this:
- Exposure: up just a little
- Shadows: up moderately
- Noise Reduction: up a bit
- Sharpness: down slightly if the grain looks harsh
- Definition: use sparingly
- Warmth: adjust based on skin tone
- Vibrance: up slightly
Why it works: the trick is to improve the image without overcooking it. Too much sharpness and too much brilliance can make low-light selfies look crunchy fast.
The sliders that matter most
If you have always felt lost in the Photos app, focus on these first:
Exposure
This changes overall light. Good for broad fixes. Easy to overdo.
Highlights
This helps recover bright areas like skies, windows, and shiny foreheads. Very useful.
Shadows
This lifts darker parts of the image. Great for faces hidden in backlight.
Brilliance
This is one of Apple’s sneaky best tools. It often improves midtones and detail in a smarter way than just blasting brightness. Use it gently.
Black Point
This adds depth by making dark tones richer. Helpful if your edit starts to look faded.
Vibrance
This boosts color more carefully than saturation. Safer for people photos.
Noise Reduction
Useful for low-light grain. Too much can smear details.
How to test whether your preset is actually good
Do not judge it on one miracle photo.
Paste the edits onto three to five similar photos. If all of them look better, even if not perfect, you have a keeper. If one looks great and the others look weird, your edit is too extreme.
That is the sweet spot. A good rescue preset should be boringly reliable.
One important thing people forget
Copy and Paste Edits works best on photos shot in similar conditions.
A preset for a dim restaurant will not magically fix a sunny backyard portrait. A harsh daylight fix will probably make an already dark image look gloomy.
Think of these as situation-based presets, not one filter for your whole life.
How to stay organized without overthinking it
You do not need a notebook full of settings. Just make mental labels:
- Indoor dark
- Sunny outdoor
- Night selfie
That is enough for most people.
If you want to get fancy, save a few sample photos in a dedicated album called “Edit Templates” so you can reopen one, copy its edits, and paste them onto new shots whenever needed.
If you mess up, your original is still safe
This is the part that makes experimenting much less scary. Edits in the iPhone Photos app are non-destructive.
You can tap Revert and go back to the original photo later.
So if your daylight preset makes everyone look orange, or your indoor fix turns a dinner photo into a foggy mess, you have not ruined anything.
A small shortcut that saves real time
If your phone ever feels like it loses your place while bouncing between Photos, Messages, and social apps, it is worth knowing a few iPhone recovery tricks outside of photo editing too. A lot of readers who like fast workflows will also appreciate Stop Letting Crashes Kill Your Work: The Hidden ‘Instant App Recovery’ Trick iPhone Power Users Use To Reopen Everything In Seconds.
It is the same basic idea. Less redoing. More getting on with your day.
Common mistakes to avoid
Using too much Brilliance
It can make photos pop, but too much gives images that fake HDR look.
Raising Shadows all the way
Yes, it reveals faces. It also reveals noise and can flatten the image.
Boosting Saturation instead of Vibrance
Saturation is heavier-handed. Vibrance is usually kinder to skin tones.
Copying edits across completely different scenes
This is the fastest way to think the feature is bad when really the match is bad.
At a Glance: Comparison
| Feature/Aspect | Details | Verdict |
|---|---|---|
| Copy and Paste Edits | Lets you apply one finished edit to other similar photos in a few taps. | Best hidden time-saver in Photos. |
| Built-in slider control | Exposure, Highlights, Shadows, Brilliance, Vibrance, Noise Reduction, and more are now strong enough for most casual editing. | More powerful than most people realize. |
| Non-destructive editing | You can always revert to the original if an edit goes wrong. | Safe to experiment with. |
Conclusion
The best hidden iPhone photo editing tricks are not really about mastering every slider. They are about building a couple of reliable fixes you can trust. iOS 17 and 18 quietly turned the default Photos app into a mini Lightroom, but most people still poke at random controls or give up and post mediocre shots. If you make two or three rescue presets for dark indoor photos, blown-out daylight, and grainy low-light selfies, you can improve almost everything you share in about five seconds. That is a real upgrade, and it makes your iPhone camera feel smart again. Not confusing. Start with one bad photo today, make one good fix, and reuse it. You will wonder why you ever edited every picture from scratch.