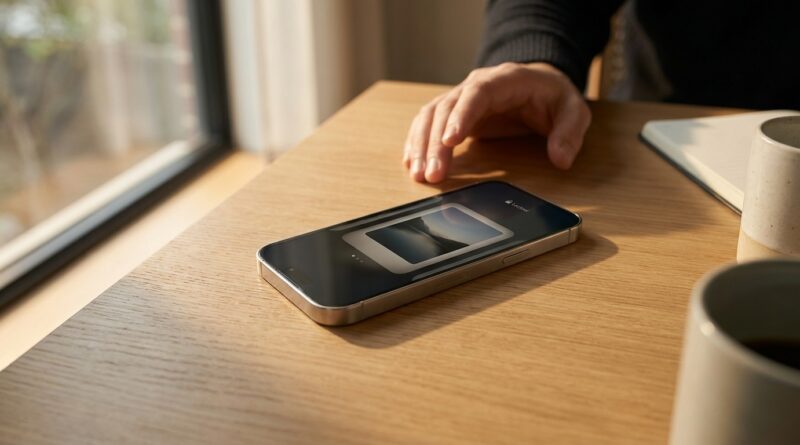
Stop Letting Borrowed iPhones Go Wild: The Hidden ‘One‑App Lockdown’ Trick Power Users Use To Hand Their Phone To Anyone Safely
That little panic when someone says, “Can I see?” is real. You hand over your iPhone to show a photo, a map, a video, or a song, and suddenly they are one swipe away from your texts, work email, saved passwords, or that half-finished note you really did not mean to share. It feels silly to hover over their shoulder, but it also feels risky to just trust that they will stay in the app you opened. The good news is that Apple has had a fix for this for years. It is called Guided Access, and once you turn it on, you can lock your iPhone to one app so the person holding it cannot wander anywhere else. If you have ever searched how to lock iphone to one app guided access, this is the setting you were looking for. It is quick to set up, easy to use, and far more useful than most people realize.
⚡ In a Hurry? Key Takeaways
- Guided Access lets you lock your iPhone to a single app so nobody can hop into Messages, Mail, Photos, or anything else.
- Turn it on in Settings > Accessibility > Guided Access, then start it by triple-clicking the side button in the app you want to share.
- It is great for lending your phone to kids, friends, coworkers, or clients, and it also helps with focus and distraction control.
What Guided Access actually does
Guided Access is basically a one-app lockdown mode for your iPhone. You open the app you want someone to use, start Guided Access, and the phone stays inside that app until you end the session with Face ID, Touch ID, or your passcode.
That means you can hand over your phone for one task without exposing the rest of your digital life. No accidental swipes into your notifications. No curious detours into Safari. No surprise text replies sent to your boss by a toddler.
Apple first built it as an accessibility feature, but plenty of regular people now use it as a privacy tool, a parenting tool, and a focus tool.
How to turn on Guided Access
If you want to know how to lock iphone to one app guided access, the setup only takes a minute or two.
Step 1: Enable the feature
Go to Settings, then Accessibility, then scroll down to Guided Access.
Turn Guided Access on.
Step 2: Set your passcode
Tap Passcode Settings. From here, you can set a dedicated Guided Access passcode or allow Face ID or Touch ID to end sessions more quickly.
If your iPhone supports Face ID, turn that on. It makes ending Guided Access much easier.
Step 3: Optional time limits and shortcuts
You can also turn on a sound or spoken alert for time limits. Most people will not need this right away, but it can be handy if you are giving your child a short video window or using your phone for a timed task.
How to lock your iPhone to one app
Now for the part you will actually use every day.
- Open the app you want to share.
- Triple-click the side button on Face ID iPhones, or the Home button on older models.
- Tap Guided Access.
- If you want, adjust the options before starting.
- Tap Start in the top-right corner.
That is it. The iPhone is now locked to that app.
If you hand your phone to someone to view photos, they stay in Photos. If you open YouTube for a kid, they stay in YouTube. If you are showing a client a demo, they stay in the demo app.
The most useful settings before you hit Start
This is where Guided Access gets smarter than people expect.
Disable touch in part of the screen
Before starting a session, you can draw a circle around areas of the screen you want to block. The iPhone will ignore taps there.
This is especially useful for ads, menu buttons, or “up next” areas in video apps.
Turn off buttons
You can disable the side button, volume buttons, keyboard, motion, or touch entirely depending on what you are trying to do.
For example, if a child keeps pausing a video or changing volume, you can shut that down.
Set a time limit
If you are handing your phone to a child for ten minutes, you can set a timer. When time is up, the session ends with an alert.
Best real-world uses for Guided Access
1. Safely showing photos and videos
This is the classic use. Open Photos, start Guided Access, and hand over the phone without worrying about someone drifting into your full library, shared albums, or other apps.
2. Letting a kid watch one thing without chaos
If you have ever handed a child your iPhone for one cartoon and gotten it back on a random app, with notifications opened and settings changed, Guided Access fixes that fast.
You can lock them into YouTube Kids, Disney+, or any approved app and stop the endless tapping around.
3. Running a work or client demo
Your phone probably holds more work and personal information than your laptop at this point. Guided Access is perfect when you need to show a mockup, portfolio, checkout flow, or slideshow without risking incoming messages or app switching.
4. Building a focus kiosk for yourself
This is the sneaky power-user move. Guided Access is not just for other people. You can use it on yourself when you want to stay inside one app and stop bouncing around.
If that sounds appealing, you might also like Stop Letting On‑Screen Clutter Kill Your Focus: The Hidden ‘Per‑App Full‑Screen Gestures’ Trick iPhone Power Users Use To Make Every App Feel Custom‑Built, which pairs nicely with this kind of distraction control.
How to end Guided Access
When you want your full phone back, do this:
- Triple-click the side button or Home button again.
- Authenticate with Face ID, Touch ID, or your Guided Access passcode.
- Tap End.
If Face ID does not kick in right away, do not panic. Hold the phone naturally, authenticate, and then end the session.
What Guided Access does not do
It is excellent, but it is not magic.
It does not hide notifications by itself
If a notification pops up while Guided Access is active, that can still be awkward. For extra privacy, turn on Do Not Disturb or a Focus mode before handing over your phone.
It is not a full parental control system
For long-term kid management, Screen Time still matters. Guided Access is more like a quick one-app lock for the moment you are in.
It is not remote-proof if someone knows your passcode
If the person borrowing your phone knows your device passcode and can end Guided Access, then the protection is obviously weaker. This works best when your passcode is private.
Common mistakes people make
Forgetting to enable it first
If the triple-click does nothing, you probably have not turned on Guided Access in Accessibility settings yet.
Not setting Face ID or Touch ID
This makes exit much clunkier. Biometrics save time.
Skipping notification control
If privacy is the goal, combine Guided Access with Focus mode. That way the phone is locked to one app and also not buzzing with banners.
Not testing it before you need it
Do one practice run now. It is much better to learn it on the couch than while trying to hand your phone to a client or a restless six-year-old.
Why this feature suddenly feels more important
Our phones are not just phones anymore. They are wallets, offices, family photo albums, chat hubs, password vaults, and entertainment centers. So handing your iPhone to somebody for one tiny task now feels a lot more personal than it used to.
That is why Guided Access is getting fresh attention. It solves a very normal, very current problem without making you buy anything or install anything.
It is one of those rare iPhone features that feels hidden, but once you start using it, you wonder why Apple does not put it front and center.
At a Glance: Comparison
| Feature/Aspect | Details | Verdict |
|---|---|---|
| Privacy protection | Locks the iPhone to one app so borrowers cannot jump into your messages, banking, email, or other apps. | Excellent for everyday peace of mind |
| Ease of setup | Takes about two minutes in Accessibility settings, then starts with a triple-click. | Very easy once enabled |
| Best use cases | Showing photos, kid-safe video sessions, music control, client demos, and self-focus sessions. | One of the most useful hidden iPhone tricks |
Conclusion
Guided Access has quietly sat inside the iPhone for years, but it is finally getting the attention it deserves. And honestly, that makes sense. More of us now carry our work, banking, private chats, family photos, and personal notes on one device. Handing that device to someone else, even for a second, can feel weird. This fixes that. You can let someone scroll photos, watch a video, run a presentation, or cue up music without giving them the keys to your whole digital life. Better yet, it is not just a privacy trick. It is useful for parenting, deep work, distraction control, and phone-based demos too. That is why productivity fans and parents are both rediscovering it. If you have never tried it, set it up now while you are thinking about it. It is one of the fastest iPhone upgrades you can make, and it pays you back almost immediately in privacy, calm, and control.